
Choosing receipt and checker styles
Pick receipt and checker styles, what gets printed, and your store WiFi and social media.
Available on Starter, Growth, Enterprise
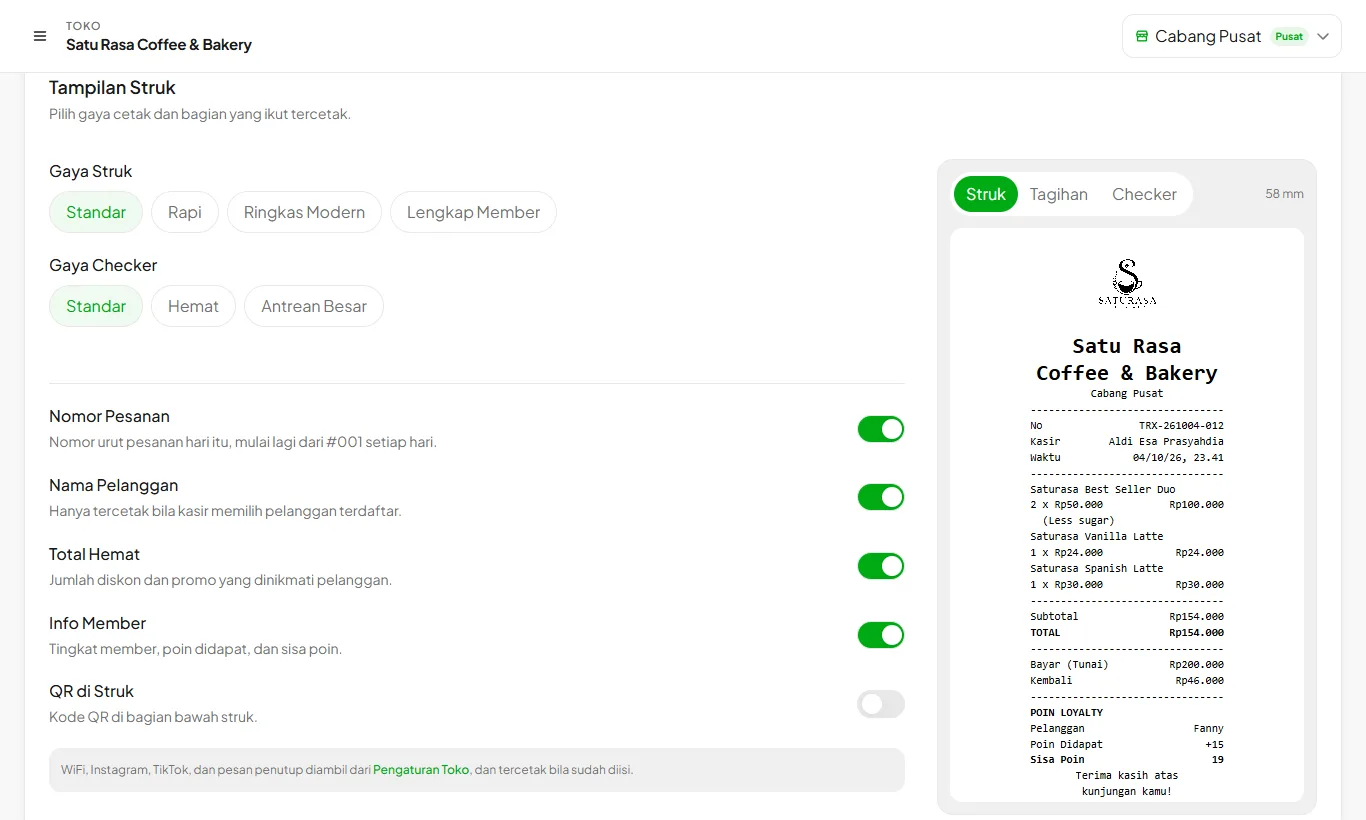
- 1
Pick a receipt style
In POS Settings under Receipt Look, pick Standard, Neat, Modern Compact, or Full Member. The kitchen checker style sits right below: Standard, Saver, or Big Queue.
- 2
Turn on the parts you want
Daily order number, customer name, total savings, member info, and QR can each be turned on. The customer name only prints when the cashier picks a registered customer. The QR can point to the QR Menu or Online Reservations.
- 3
Check the preview
The preview under Receipt Printer uses your own store name, logo, and products, and changes as soon as you switch styles. Pick Open Bill Invoice to see an unpaid table bill.
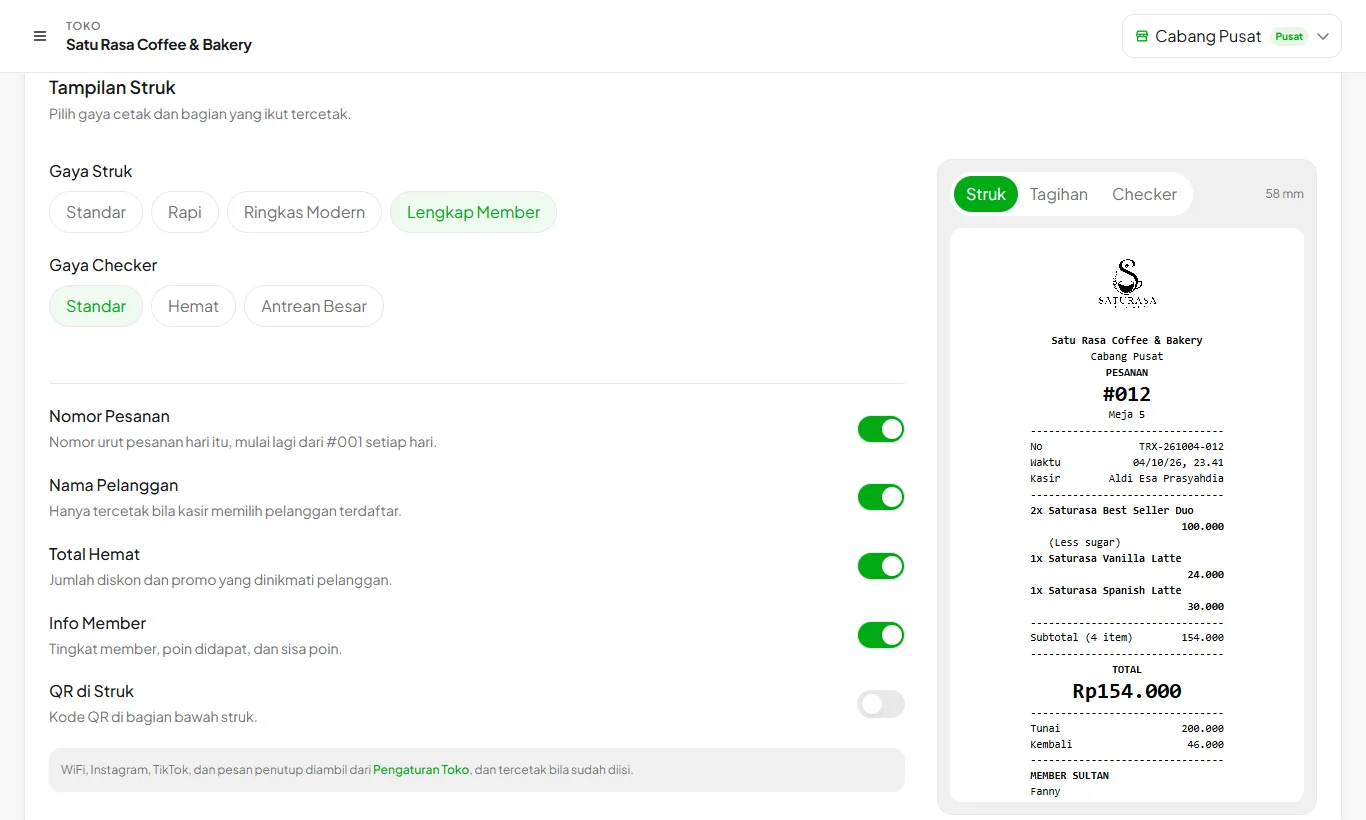
- 4
Pick a packaging label style
If you use packaging labels, choose Standard, Big Name, Queue Number, or Store Logo under Label Printer. The label preview follows your choice.
- 5
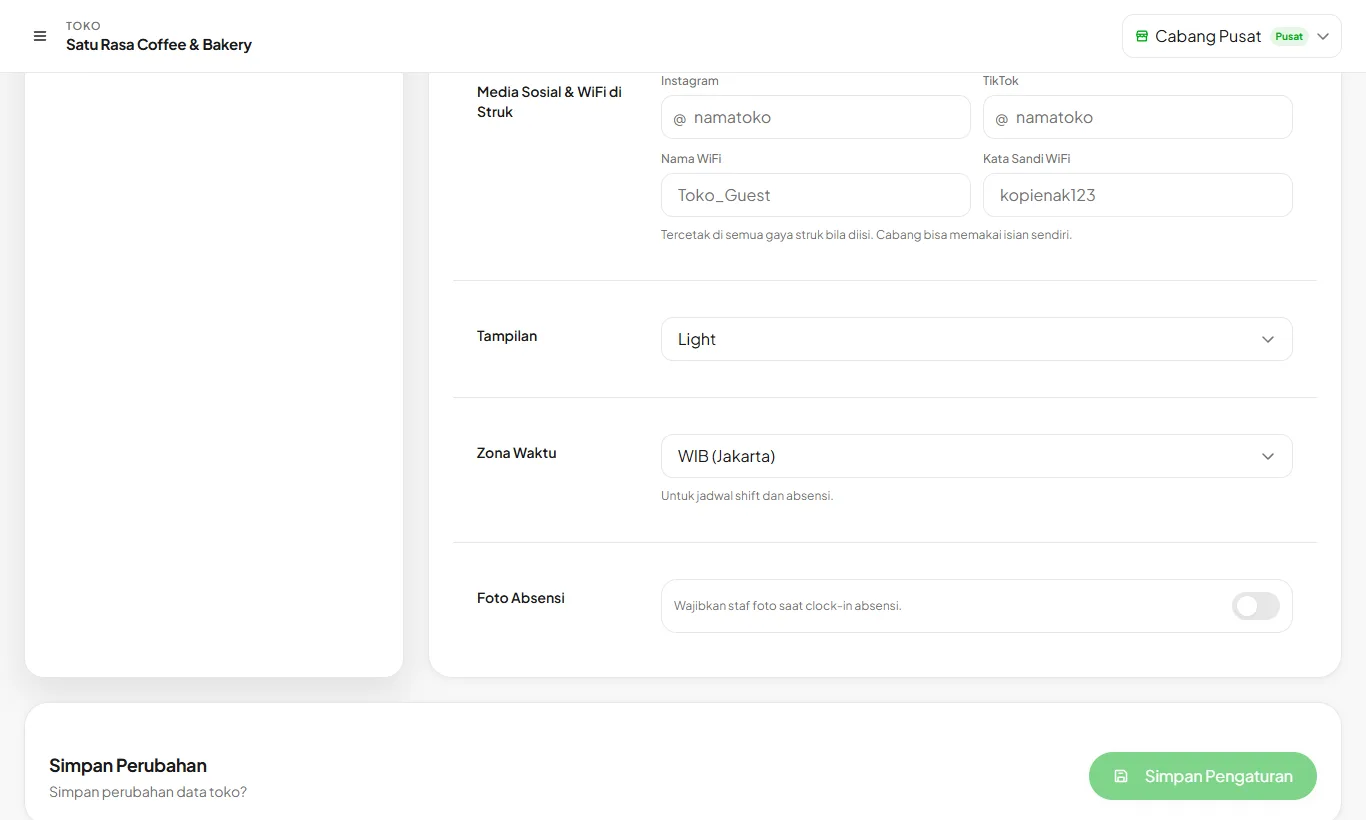
Add WiFi and social media
In Store Settings, fill in your WiFi name and password, Instagram, and TikTok. Every receipt style prints them once filled, with Instagram and TikTok logos. Stores with branches can set different details per branch from the Branches menu.
Transaction codes run in order every day, for example TRX-261004-001, so they are easy to match with reports.