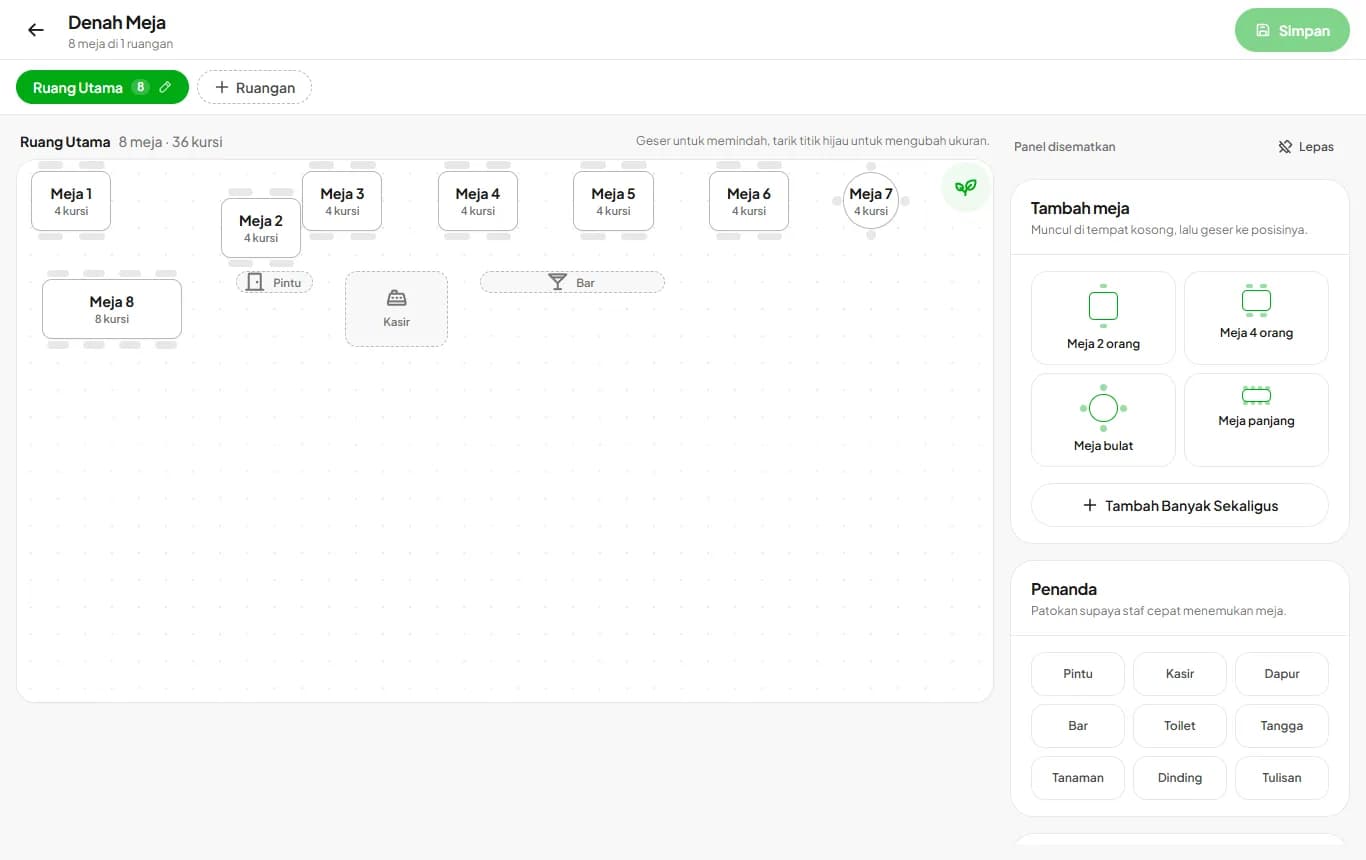
Table floor plan
Lay out tables to match your space, then the cashier picks tables right from the plan and sees which are free or taken.
Available on Growth, Enterprise
See the steps· 5 stepsSteps · 5
Step 1
Create the plan
Open Settings then Table Floor Plan, press Create Plan, and name your first room, such as Main Room. Then pick the table type, how many, and a name prefix, such as Table 1 to Table 6. The tables are laid out neatly in the free space.
Step 2
Arrange the tables
Drag a table into place and pull the green dot to resize it. Tap a table to change its name, seats, square or round shape, duplicate, or delete it.
Step 3
Rooms, markers, and the panel
Add rooms such as Terrace or 2nd Floor with the Room button, and tap a room name to rename it. Set the room width and length in the right panel. Markers like the door, cashier, bar, and plants help staff find tables fast. Pin the right panel, or unpin it so the canvas fills the screen. Press Save when you're done.
Step 4
Pick a table at the cashier
At the cashier, press Save to Table and the plan opens full screen. Tap a table, then press Open. Free tables are white, taken ones green with the total and time seated, and reserved ones orange.
Step 5
Add to a taken table
Tap a taken table to add the order to its bill. Move Table uses the plan too, and taken tables can't be picked.
Each branch has its own plan. With the QR Menu on, per-table QR codes can be downloaded or printed from the plan, and the table number fills in when guests order.
The Type Name button stays for orders outside the plan, such as a takeaway customer's name.
Ready to try it in your store?
Sign up free and follow this guide right in the app.